


 |
Chain mail
|
Making chain mail is a tedious, time-consuming, but rewarding
hobby. I have more or less completed my chain mail vest
(which I will soon work on converting into a shirt by adding
arms and extending its length), and am currently working
on a coif. For those in-the-know, I am using a Euro 4-in-1
weave for my vest and my coif. I'm not making these for
a movie or anything--just for fun. And, on the off chance
that someone decides to attack me with a medieval weapon,
I will be protected (if I'm wearing the armor, that is).
And now, without further ado...
The process (part 1: the vest)
|
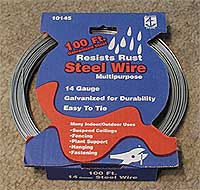 |
Begin with coils of 14 gauge galvanized (non-rusting) steel
wire. 100 foot coils were the largest I could find at my local
hardware store. You can use lower gauge (harder to bend and
thicker) if you want larger rings, or higher gauge (easier
to bend) if you want smaller rings. I've found that 14 gauge
wire is perfect for rings with an inner diameter (determined
by the coiling rod seen below) of 3/8 inch. |
 |
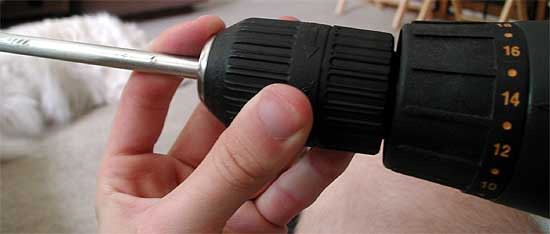
Next you stick the rod into a drill (like a 4 foot-long
drill bit; see above) to make the coiling process a little
easier. I had coiled several hundred feet by hand before I
learned this trick, and my hands were very grateful. Then
slip the wire through a small hole you drilled in the rod.
Bend the wire around once so it stays, then adjust the drill's
direction to match the direction of the coils. Then, wedging
the drill securely (some people use a vice; I use a sofa)
turn it on at a slow speed and begin coiling the wire around
the rod (below). Notice that I'm wearing gloves: there is
a lot of friction and tension build-up, so these are
a necessity. |
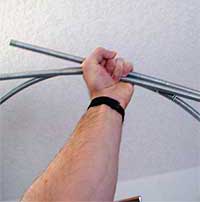 |
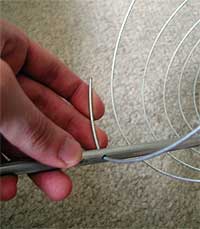
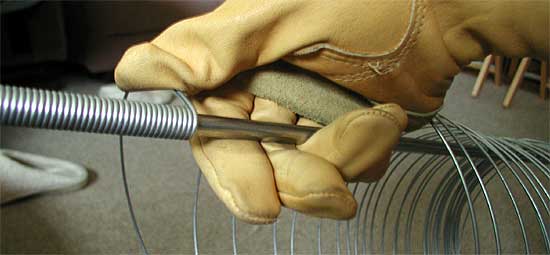
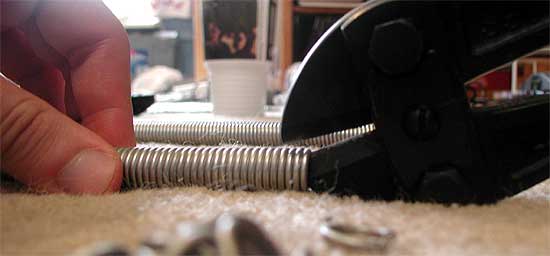
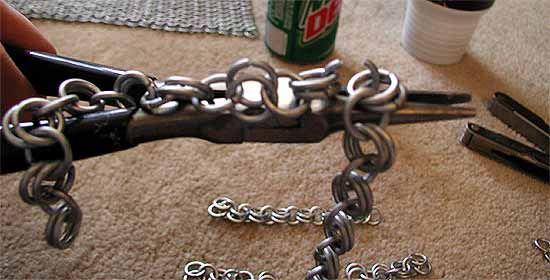
It takes some practice and a very steady hand, but you end
up with nice, tight coils like the ones I'm holding on the
left. You can attempt to cut these coils into individual rings
with wire cutters, but I strongly recommend a pair of heavy-duty
bolt cutters (below). This steel is stronger than it looks,
and bolt cutters go through them easily (I can usually cut
through them two at a time with bolt cutters). |
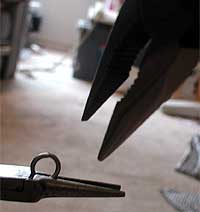 |
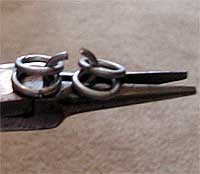
Then, using pliers, close some of the "open" rings
you've produced. If you're doing a 4-in-1 pattern (the simplest
one to do and the only feasible pattern using rings as small
as these) approximately half of your rings will be closed
individually in this fashion. |
 |
Next, using one "open" ring and four "closed"
rings (this is where the "4-in-1" gets its name),
make a whole bunch of "fives." When you have a decent
amount of these made, link them together into chains of fives.
This is done in the same way that you make fives (see below).
These chains will determine the width of the patch
of chain mail you're making. I make somewhat long chains using
16 fives each (a total of 95 individual rings). |
| Then link these chains together to make large rectangular
patches of chain mail. This is where you have to be careful
to align the rings properly; just remember that the horizontal
rows alternate direction and you should be fine. (If you look
at the zoomed-in section below, you can see that the "centers"
of the fives go down-to-up; the outside "closed"
rings always go up-to-down. As long as you align your chain
with what you've already linked, the process is easy enough.) |

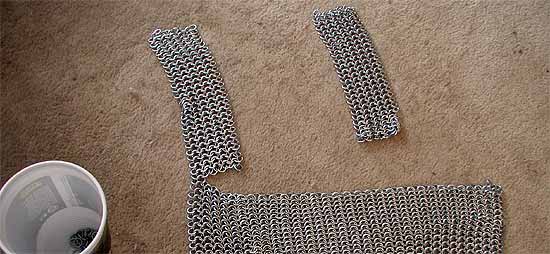
| In this way, make two large chain mail rectangles (each
containing approximately 400 feet of wire). The next step
is connecting these with shoulder straps. I made deliberately
thin straps, as the fitting and tapering would have to be
done later, and this would ensure the least amount of wasted
work. |
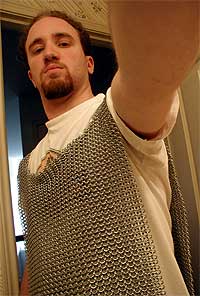 |
Here you can see me wearing my chain mail vest for the first
time. It hangs rather loosely and isn't too comfortable, since
the sides are open and the weight flops around a bit. If you
look closely you can see that the neck hole is rather large
and the weight of the metal pulls it forward. I address this
issue in the next step by shrinking down, rounding, and tapering
the neck area. |
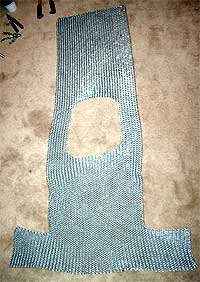 |
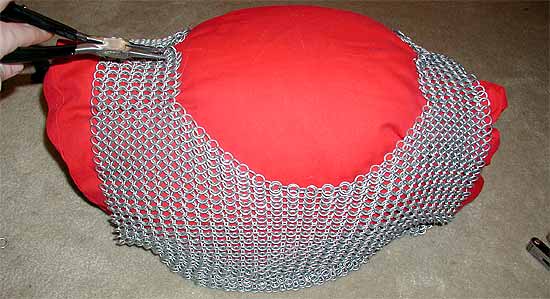
The next step is rounding out the neck hole (well, building
in the corners, which makes it a more-or-less octagonal hole)
and building up the sides. Once I built the sides up enough,
I connected the front and the back sides of the vest. I didn't
take a picture of this, but I stuffed the vest with a pillow
to make the process easier. Once I was able to wear my closed
vest, I discovered that the shoulder straps dug into my skin.
To even the weight distribution, I used the pillow to get
at the top of the vest (picture below). Then I opened up the
inner half of each strap and inserted expansion links. |
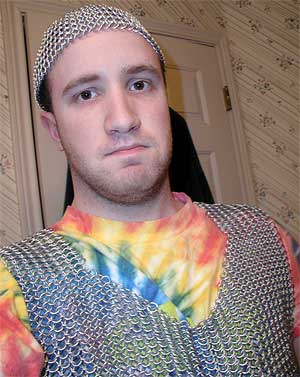 |
Not the best picture, but here you can see me wearing my
practically-complete vest as well as the beginnings of a
coif on my head. I will return to the vest later, tapering
the neck hole some more, adding short sleeves, and extending
the body of the shirt by another foot, but by this point
I've spent over six months working on it, and I need a break.
Hence the coif.
|
The process (part 2: the coif)
|
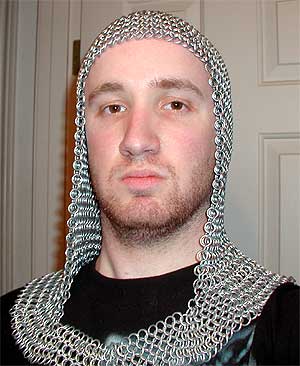 |
The coif is a much trickier beast to tackle. And, unfortunately,
I did not think to take pictures of the earliest stages.
Essentially, you begin with one slightly larger ring which
goes on top of your head. Then you link a bunch of rings
around that, and even more rings around those, and
so on, expanding in an even circle until you have the little
cap I'm wearing in the picture above. For those curious,
my forehead is approximately 65 rings in circumference.
Once the forehead is reached, you build a sheet which drapes
down to your shoulders (the sheet here has a width of 3/4
of the circumference, 48 rings). Once the shoulder is reached
you again add expansion rings, although it looks best to
concentrate them at four points around the original circle
(rather than distribute them evenly) to produce an octagon.
It is hard to tell in this picture, since the coif is still
far from complete, but the direction the "grain"
runs in the finished product creates a nice effect.
|
A link of interest
Decordené
Wireworks: this site has plenty of pictures of finished
chain mail pieces, as well as how-to pages discussing various
weaves and designs (such as how to make a coif, how to change
the direction of your weave, etc.). |
|
|